A slow Windows 10 laptop can be incredibly frustrating. What was once a zippy machine can gradually become a sluggish burden, taking ages to boot, load applications, or even browse the web. This common issue affects millions of users and stems from a variety of factors, ranging from software clutter and misconfigurations to outdated hardware.
The Windows operating system, particularly Windows 10, is designed to be efficient, but over time, accumulated digital “junk,” too many background processes, or even malware can bog down its performance. Historically, dealing with a slow PC often meant resorting to a complete reinstallation of Windows. While that’s still an option, modern versions of Windows offer numerous built-in tools and optimization strategies that can significantly improve speed without such drastic measures.
This comprehensive guide will walk you through a series of practical steps and techniques to diagnose and speed up your slow Windows 10 laptop, restoring it to its optimal performance.
Understanding Why Laptops Slow Down
Before diving into solutions, it’s helpful to understand the common culprits behind a slow laptop:
- Too Many Startup Programs: Applications that launch automatically with Windows consume valuable RAM (Random Access Memory) and CPU (Central Processing Unit) cycles, slowing down boot times and overall responsiveness.
- Insufficient RAM: If your laptop has only 4GB or less RAM, it can quickly become a bottleneck, especially with multiple applications open.
- Hard Disk Drive (HDD) vs. Solid State Drive (SSD): Laptops with traditional HDDs are inherently slower than those with modern SSDs. The read/write speeds of HDDs are significantly lower.
- Low Disk Space: A nearly full hard drive can dramatically impact performance, as Windows needs free space for temporary files, updates, and virtual memory.
- Outdated Drivers: Old or incompatible device drivers can lead to system instability and performance issues.
- Malware and Viruses: Malicious software can consume system resources, display unwanted ads, or even steal data, causing slowdowns.
- Too Many Background Processes: Even if not startup programs, many applications run in the background, consuming resources unnecessarily.
- Fragmented Hard Drive (HDDs only): Data on HDDs can become scattered, making it slower to access. SSDs do not suffer from fragmentation.
- Overheating: If your laptop’s cooling system is clogged with dust, components can overheat, leading to thermal throttling (where the CPU/GPU intentionally slows down to prevent damage).
- Outdated Windows: Missing crucial updates can mean you’re running on an unoptimized or buggy version of the OS.
Software-Based Solutions to Speed Up Your Laptop
These steps focus on optimizing your Windows 10 operating system and installed software without requiring hardware changes.
- Manage Startup Programs
Reducing the number of programs that launch with Windows can drastically improve boot times and initial responsiveness.
- Open Task Manager: Right-click on the Taskbar and select Task Manager, or press Ctrl + Shift + Esc.
- Go to the Startup tab: Click on the Startup tab.
- Disable Unnecessary Programs: Review the list of programs. For each program you don’t need to start automatically, right-click on it and select Disable. Look for programs with a high “Startup impact.” Be careful not to disable essential system services or security software.
- Uninstall Unused Programs
Every installed program takes up space and some might run background processes.
- Open Settings: Click the Start button and select Settings (gear icon).
- Go to Apps > Apps & features: Click on Apps, then Apps & features in the left-hand menu.
- Uninstall Programs: Review the list. For any program you no longer use, click on it and select Uninstall. Follow the on-screen prompts.
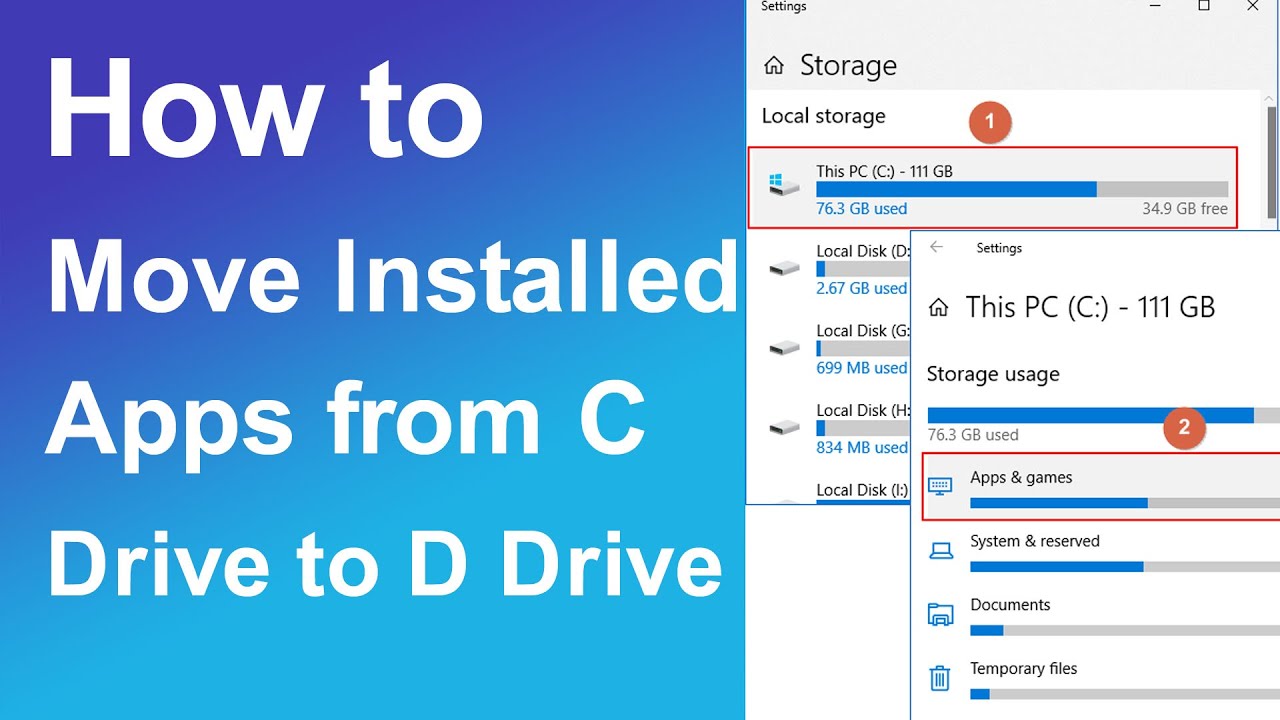
- Clean Up Temporary Files and Free Up Disk Space
Temporary files, old updates, and system caches can consume gigabytes of storage.
- Use Storage Sense:
- Go to Settings > System > Storage.
- Turn on Storage Sense to automatically free up space.
- Click on Temporary files to manually clean up. Select categories like “Temporary Windows installation files,” “Windows Update Cleanup,” “Delivery Optimization Files,” and “Recycle Bin.” Click Remove files.
- Use Disk Cleanup (Classic Method):
- Search for Disk Cleanup in the Windows search bar and open the app.
- Select your C: drive and click OK.
- Click Clean up system files for more options (like previous Windows installations).
- Select relevant checkboxes (e.g., “Windows Update Cleanup,” “Temporary Internet Files,” “Recycle Bin”) and click OK.
- Run Disk Defragmenter (for HDDs only)
If your laptop has an HDD (traditional hard disk drive), defragmenting it can improve performance. SSDs do not need defragmentation; in fact, it can reduce their lifespan.
- Open Optimize Drives: Search for defragment and optimize drives in the Windows search bar and open the app.
- Select HDD and Optimize: Select your HDD (look for “Hard disk drive” under “Media type”) and click Optimize.
- Update Windows and Drivers
Outdated system files or drivers can cause instability and slowdowns.
- Windows Update:
- Go to Settings > Update & Security > Windows Update.
- Click Check for updates and install any available updates.
- Driver Updates:
- Device Manager: Right-click the Start button and select Device Manager. Look for any devices with a yellow exclamation mark. Right-click on devices (especially Display Adapters, Network Adapters) and select “Update driver.”
- Manufacturer’s Website: For critical drivers (like graphics cards or chipsets), visiting your laptop manufacturer’s website or the component manufacturer’s website (e.g., NVIDIA, AMD, Intel) for the latest drivers is often more effective.
- Scan for Malware
Malware can silently consume system resources.
- Use Windows Security:
- Go to Settings > Update & Security > Windows Security.
- Click Open Windows Security.
- Select Virus & threat protection.
- Click Quick scan or Scan options for a full scan.
- Consider Third-Party Antivirus: If you suspect a stubborn infection, a reputable third-party antivirus program (e.g., Malwarebytes, Avast, AVG) can offer additional scanning capabilities.
- Adjust Visual Effects for Performance
Windows 10 uses various visual effects that consume resources. Disabling some can boost performance on older or less powerful hardware.
- Open Performance Options: Search for adjust the appearance and performance of Windows in the Windows search bar and open the app.
- Adjust Visual Effects: In the “Visual Effects” tab, select Adjust for best performance.
- Alternatively, select Custom and uncheck effects you don’t need (e.g., “Animate windows when minimizing and maximizing,” “Fade or slide menus into view,” “Show shadows under windows”).
- Click Apply then OK.
- Disable Background Apps
Many Microsoft Store apps run in the background even when not actively used.
- Open Settings > Privacy: Go to Settings > Privacy.
- Go to Background apps: Scroll down the left-hand menu and click on Background apps (or App permissions > Background apps in newer versions).
- Toggle off unnecessary apps: Turn off the toggle for any app that you don’t need running in the background.
- Power Plan Optimization
Ensure your laptop isn’t running on a power-saving mode that limits performance.
- Open Control Panel: Search for Control Panel in the Windows search bar.
- Go to Power Options: Change “View by” to “Large icons” or “Small icons,” then click Power Options.
- Select High Performance: Choose the High performance plan. If it’s not visible, click “Show additional plans.” Be aware that this will consume more battery power.
Hardware-Based Solutions (If Software Steps Aren’t Enough)
If software optimizations don’t yield sufficient results, it might be time to consider hardware upgrades. These are typically the most impactful ways to speed up an older laptop.
- Upgrade to an SSD (Solid State Drive)
This is by far the single most effective upgrade for an HDD-based laptop.
- Impact: Dramatically improves boot times, application loading, and overall system responsiveness.
- Consideration: Requires migrating your existing OS and data to the new SSD, or performing a clean Windows installation. This often voids warranties and can be complex for beginners.
- Increase RAM (Random Access Memory)
More RAM allows your laptop to handle more applications and processes simultaneously without resorting to slower virtual memory.
- Impact: Improves multitasking, browser performance (especially with many tabs), and performance in memory-intensive applications.
- Consideration: Check your laptop’s maximum supported RAM and the number of available slots. It’s relatively easy to upgrade.
- Clean Out Dust from Cooling System
Overheating causes your CPU to “throttle” (reduce its speed) to prevent damage. Dust buildup in fans and vents is a common cause.
- Impact: Restores consistent performance, prevents thermal throttling, and extends component lifespan.
- Consideration: Requires opening the laptop, which might void warranties or require professional assistance. Use compressed air.
Last Resort: Reinstall Windows 10
If all else fails, a clean installation of Windows 10 can truly give your laptop a fresh start by eliminating all software conflicts and accumulated junk.
- Options:
- Reset this PC (Keep my files): Reinstalls Windows but keeps your personal files. Removes all installed apps.
- Reset this PC (Remove everything): Wipes the drive and installs a fresh copy of Windows.
- Clean Install from USB: The most thorough method, involving booting from a Windows 10 installation USB and formatting the drive.
- Consideration: Always back up all your personal files before attempting a full reinstallation, especially “Remove everything” or a clean install from USB, as these will erase everything.
FAQ Section
Q1: How do I check if my laptop has an HDD or an SSD?
To check, right-click the Start button and select Task Manager. Go to the Performance tab, then click on your Disk (C:). Under the graph, you’ll see “Hard disk drive” or “Solid state drive” listed as the “Media type.”
Q2: Is it safe to disable programs in the Startup tab of Task Manager?
Generally, yes. Most programs listed in the Startup tab are non-essential applications that just want to launch with Windows. You can safely disable them. However, avoid disabling anything related to your graphics drivers, sound drivers, essential security software (like antivirus), or critical system utilities (unless you know exactly what they do). If unsure, search online before disabling.
Q3: Will “Disk Cleanup” delete my personal files?
No, Disk Cleanup is designed to delete only temporary, junk, and system files that are no longer needed. It will not touch your personal documents, photos, videos, or other data unless you specifically select the “Downloads” folder (if it appears) and choose to delete its contents. Always review the selections before proceeding.
Q4: How much RAM is enough for Windows 10?
- 4GB: Bare minimum for very light use (web Browse, email). Will be slow with multiple tabs or applications.
- 8GB: Good for most everyday tasks, light multitasking, and some basic productivity software. This is often the recommended minimum.
- 16GB+: Ideal for heavy multitasking, gaming, video editing, or running virtual machines. This provides a very smooth experience.
Q5: After trying all these steps, my laptop is still slow. What else can I do?
If software optimizations don’t work, consider the hardware upgrades mentioned (SSD is paramount if you have an HDD). If your laptop is very old (8+ years) or has extremely low-end specifications (e.g., very slow Celeron/Atom processor, 2GB RAM), it might simply be reaching the end of its useful life for modern software demands. In such cases, purchasing a newer laptop might be the most cost-effective and least frustrating solution.