Optimizing your audio experience on a Windows 10 or 11 laptop can significantly enhance music listening, movie watching, and even gaming. A sound equalizer allows you to adjust the balance of different frequency ranges in your audio, boosting bass, clarifying vocals, or brightening treble to suit your preferences or compensate for speaker/headphone limitations. While Windows itself doesn’t offer a universally accessible, full-featured graphical equalizer, it does provide some built-in enhancements and supports third-party solutions. This guide will detail how to enable a sound equalizer in Windows 10/11, covering both native options and powerful third-party alternatives.
Understanding Sound Equalization
An equalizer (EQ) works by allowing you to boost or cut specific audio frequencies.
- Low frequencies (Bass): For deep thumps and rumbles.
- Mid-range frequencies (Mids): Where most vocals and instruments reside.
- High frequencies (Treble): For crispness, cymbals, and sparkling sounds.
Adjusting these can dramatically change how audio sounds.
- Using Windows’ Built-in “Loudness Equalization” and “Equalizer” Enhancement (Limited)
Windows offers a basic “Equalizer” tab or “Loudness Equalization” under sound device properties. The availability of the “Equalizer” tab depends heavily on your audio driver (often Realtek).
- Step 1: Open Sound Settings.
- Windows 11: Right-click the speaker icon in the taskbar, then select “Sound settings.”
- Windows 10: Right-click the speaker icon in the taskbar, then select “Open Sound settings.”
- Step 2: Access Sound Device Properties.
- Windows 11: Under “Output,” click on your primary output device (e.g., “Speakers (Realtek(R) Audio)”). Then scroll down and click on “Audio enhancements.”
- Windows 10: Under “Output,” click on “Sound Control Panel” (often on the right side under “Related Settings”). This opens the older Sound dialog box.
- Step 3: Navigate to Enhancements Tab.
- From Sound Control Panel (Windows 10 & 11 via Sound Control Panel): In the “Playback” tab, right-click on your active speaker/headphone output device and select “Properties.”
- In the Properties window, go to the “Enhancements” tab.
- Step 4: Enable Equalizer or Loudness Equalization.
- For “Equalizer” (If Available):
- Look for a checkbox labeled “Equalizer” or “EQ.” Check this box.
- If it appears, you might see a dropdown menu next to it where you can select a preset (e.g., Bass, Treble, Live).
- Some drivers provide a small “…” or settings button next to the Equalizer checkbox, which opens a graphical equalizer. This is entirely dependent on your sound card driver (most commonly Realtek HD Audio Manager).
- If you find a graphical equalizer, you can adjust the sliders for different frequencies.
- For “Loudness Equalization”:
- Check the box next to “Loudness Equalization.” This feature aims to reduce the perceived difference in loudness between loud and quiet sounds, which can make dialogue clearer in movies and keep overall volume more consistent. It’s not a true EQ, but it’s a common enhancement.
- Click “Apply” then “OK” to save your changes.
- For “Equalizer” (If Available):
Note: If you don’t see an “Equalizer” tab or an explicit “Equalizer” option under “Enhancements,” your default Windows audio driver does not provide this graphical EQ functionality. You will need a third-party solution.
- Install Realtek HD Audio Manager (If Your Laptop Has Realtek Audio)
Many Windows laptops use Realtek audio chipsets. Installing the proper Realtek HD Audio Manager software can provide a comprehensive equalizer.
- Step 1: Identify Your Audio Driver.
- Right-click the Start button and select “Device Manager.”
- Expand “Sound, video and game controllers.”
- Look for “Realtek High Definition Audio“ or similar. If you see it, proceed.
- Step 2: Download Realtek Audio Console/Manager.
- Crucially: Do NOT download generic Realtek drivers from unofficial sites.
- Go to your laptop manufacturer’s support website (e.g., Dell, HP, Lenovo, Asus).
- Enter your specific laptop model number.
- Navigate to the “Drivers” or “Support” section and look for the latest Audio Driver.
- Download the Realtek Audio driver package. This often includes the Realtek Audio Console (for Windows 10/11) or Realtek HD Audio Manager (older versions).
- Step 3: Install the Driver and Software.
- Run the downloaded installer. It might require you to uninstall the current driver first and then reboot.
- After installation, you should find the Realtek Audio Console app in your Start menu or a shortcut for Realtek HD Audio Manager in your system tray or control panel.
- Step 4: Access and Use the Equalizer.
- Open the Realtek Audio Console/Manager.
- Look for an “Equalizer” or “Sound Effect” tab.
- You’ll find a graphical equalizer with sliders for different frequency bands and often pre-set profiles (e.g., Rock, Pop, Classical).
- Adjust the sliders to customize your sound.
- Using a Third-Party Software Equalizer (Most Powerful Option)
For universal control over all audio output, regardless of your sound card, a third-party equalizer application is the best choice.
- Recommended Software:
- Equalizer APO (Free & Powerful): A highly regarded, open-source parametric/graphic equalizer. It runs as an Audio Processing Object, meaning it integrates deeply with Windows’ audio stack. It requires a bit more setup but offers incredible control.
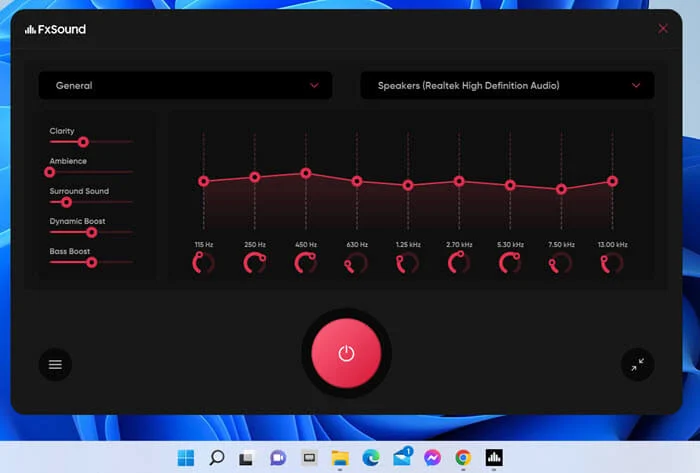
- FxSound (Paid, with free trial): Offers a user-friendly interface with presets and a good equalizer.
- Boom 3D (Paid, with free trial): Provides a 3D surround sound experience along with a powerful equalizer.
- Steps for Equalizer APO (General Guide):
- Step 1: Download Equalizer APO.
- Go to the official Equalizer APO website (e.g., SourceForge).
- Download the latest stable version.
- Step 2: Install Equalizer APO.
- Run the installer.
- During installation, the “Configurator” will open. Select the audio output device (e.g., your speakers/headphones) that you want to apply the EQ to. Click “Install” for that device.
- You’ll likely be prompted to restart your computer. Do so.
- Step 3: Configure Equalizer APO with Peace GUI (Recommended).
- While Equalizer APO works via a text file, the Peace Equalizer GUI is a highly recommended graphical interface for it.
- Download Peace Equalizer GUI from its official website (also on SourceForge).
- Run the Peace installer. It will usually detect your Equalizer APO installation.
- Step 4: Use Peace GUI to Adjust EQ.
- Open the Peace Equalizer GUI from your Start menu.
- You’ll see a graphical equalizer with numerous bands. You can:
- Drag the sliders up or down to boost or cut frequencies.
- Use the “Preset” dropdown to select pre-configured profiles (e.g., “Bass boost,” “Vocal boost”).
- Save your own custom presets.
- The changes apply in real-time to your audio.
- Step 1: Download Equalizer APO.
Important Considerations:
- One EQ at a Time: Avoid running multiple equalizers simultaneously (e.g., Realtek’s EQ and Equalizer APO) as they can conflict and degrade audio quality.
- Speaker/Headphone Quality: An equalizer can improve sound, but it cannot magically make poor-quality speakers or headphones sound like premium ones. It’s about optimizing what you have.
- Source Audio Quality: EQ works best with good quality audio sources. Low-bitrate or highly compressed audio will still sound poor.
- Restart Applications: After making significant EQ changes, sometimes restarting audio-playing applications (browsers, music players) might be necessary for the changes to take full effect.
By following these steps, you can successfully enable a sound equalizer in Windows 10/11, tailoring your audio output to your exact preferences for a more enjoyable listening experience.